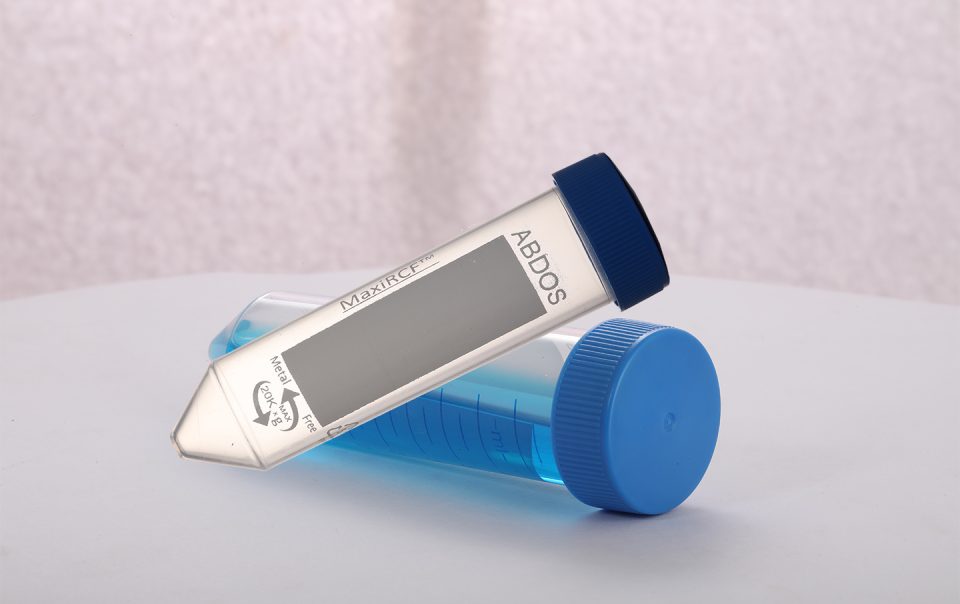
• Home
  • Latest News
  • Company Website
  • Contact Us
  • Home
  • Latest News
  • Company Website
  • Contact Us
Life Sciences

Basic Techniques of Aseptic handling in a Microbiology Labs

By Abdos 

Introduction :

A lot of precaution must me exercised during inoculation procedures in order to control the contamination of microbiological cultures, personnel or the surroundings. In order to ensure a smooth operation, make sure that all requirements are available in the immediate vicinity before starting any practical work. The laboratory wares must not be left open for longer duration of time and flaming of the mouth is mandatory in a slightly tilted position before sealing it back with a cotton plug or a screw cap to ensure sterility of the contents and the air column above. Always use sterile pipette and tips for handling cultures or for transfer of sterile content while making sure that the pipette or the tip are not coming in contact with any non-sterile surface. A petri dish must be opened only in between two Bunsen burners or inside a sterile laminar flow hood to prevent any form of contamination.

Nichrome / Aluminum Inoculating Loop:

A wired inoculation loop must be heated until red-hot to ensure that spores are destroyed completely and subsequently cooled before being used in transfer of another culture or before safely putting it away. The loop handle is held like a pen to allow the outer fingers to open or close the cotton plug or screw cap of transfer vessel or culture tubes.

Procedure for flaming the loop:

Heat the end of the loop gradually to prevent the culture from burning rapidly and spluttering the contents and contaminating the environment.
  1. The wired loop is held above the light blue cone of the Bunsen burner flame and drawn upwards to the hottest region
  2. Hold it there until the wire is red hot and ensure the full length of the wire is heated.
  3. Allow the wire to cool before it is put to immediate use.
  4. Never agitate the loop and flame it again before using it again.
Ensure that the end of the wired loop is coiled in to a circle to hold the liquid being transferred or use a laboratory forceps to make sure the circular wire loop is complete. Hold the pipette barrel as you would a pen but do not grasp the teat. The little finger is left free to take hold of the cotton wool plug/cap of a test tube/ bottle and the thumb to control the teat.

Using a Pasteur pipette:

Sterile Pasteur pipettes are used to transfer sterile solutions and microbiological cultures.

  1. The Pipette must be removed from the wrapper and held firmly by the end that contains a cotton wool plug ensuring minimum contact and fix the bulb (if available separately).
  2. Squeeze the bulb gently and take up an amount of fluid that is adequate and at the same time does not reach and wet the cotton wool plug inside the pipette.
  3. Squeeze out excess volume gently if a desired volume is required as per the measurement. The pipette tip must remain marginally below the liquid meniscus while drawing liquid to prevent the air bubbles which may cause aerosol formation when liquid is dispensed.
  4. Dispose the contaminated pipette in to a disinfection container. Do not remove the bulb while inside the disinfection container to prevent contamination of the working table.

Take care to ensure that the pipette bulb is not ill-fitted or the cotton plugs are correctly placed inside the pipette to avoid any leak

A leaking pipette is caused by either a faulty or ill-fitting teat or fibres from the cotton wool plug between the teat and pipette. A dropping (Pasteur) pipette can be converted to delivering measured volumes by attaching it to a non-sterile syringe barrel by rubber tubing. A transparent Pasteur pipette made of LDPE, with clear graduation markings is ideal for easy liquid observation.

How to flame the neck of bottles and test tubes?

  1. Loosen the cap and lift the bottle or test tube with the left hand.
  2. The cap or the cotton wool plug may be removed with the little finger of the right hand.
  3. While still holding the cap or cotton wool plug, flame the neck of the bottle or test tube by passing the neck through a hot Bunsen burner flame moving ahead and back.
  4. Replace the cap on the bottle or cotton wool plug using the little finger. 

Smudging of labels can happen if they are not positioned correctly or labeled with markers and covered with adhesive tapes. If a cotton wool plug accidentally catches fire douse the flame with a dry cloth never blow or dip in water.

Handling Bacteria and yeast cultures

Streak plate

An inoculation loop with a smooth circular shape is used for preparing a streak plate. A progressive dilution technique is followed by streaking the plate with a single, pure inoculum over several different areas of the plates to produce individual colonies. A smooth disposable ABS inoculation loop is ideal, however while using a Nichrome loop, a proper flaming technique has to be followed.

Procedure:

  1. Flame the loop and allow to cool while holding it between two Bunsen burners.
  2. While holding the loop in the right hand, loosen the cap of the bottle containing the inoculum (held in your left hand) between the little finger and the palm of the right hand.
  3. Flame the neck of the bottle/test tube.
  4. Hold the loop still and insert the loop into the culture broth and withdraw.
  5. Flame neck of the bottle or test tube and replace the screw cap or cotton plug on the bottle or test tube using the little finger. Place bottle or test tube on the rack or table.
  6. Gently lift the lid of the petri dish containing the solid agar surface while holding the loaded loop parallel to the surface of the agar and streak the inoculum across a small area as gentle strokes of parallel lines from to dilute the culture. Ensure that a small amount of culture is carried over.
  7. Remove the loop and close the Petri dish, flame the loop and allow to cool. Turn the dish through 90° ant-clockwise again and streak again across the surface of the agar in three or four parallel lines.
  8. Repeat again until four or five different regions of the petri dish has been streaked Or until all the culture in the loop has been used up.
  9. Remove the inoculation loop and close the petri dish. Flame the loop again.
  10. Ensure that the plate is sealed and incubated in an inverted position at 37°C for 72 hours.

Pour plate technique:

  1. A pour plate technique is the one in which a small amount of inoculum from broth culture is added by pipette to the center of a petri dish OR Melted and cooled agar medium in a test tube or bottle is poured into the petri dish containing the inoculum. The petri dish is gently rotated to ensure that the culture and medium are mixed thoroughly and the medium evenly covers the plate. Pour plates allow microorganisms to grow both on the surface and inside the medium. If we know the dilution and volume of the inoculum (around 1 cm3), the viable count of the sample per cm3 can be determined. The dilutions chosen must be appropriate to produce enough ( around 100) countable colonies.

    Procedure:

    1. The cap or cotton plug of the bottle containing the inoculum is loosened and then the sterile Pasteur pipette from its container is removed. The bulb is attached and held in the right hand.
    2. The bottle or test tube containing the inoculum is lifted with the left hand and the cap or cotton plug is removed with the little finger of the right hand.
    3. The bottle or test tube neck is flamed.
    4. The bulb of the pipette is squeezed very slightly, and the pipette is put into the bottle/test tube and a little of the culture is drawn. Avoid squeezing the bulb of the pipette after it is in the broth as this could cause bubbles and aerosols.
    5. Remove the pipette and flame the neck of the bottle or test tube again, before replacing the cap or cotton plug.
    6. Place bottle or test tube on table holding the pipette as still.

    Inoculate the Petri dish

    1. The lid of the Petri dish slightly lifted with the right hand and the pipette is inserted into the petri dish. The required volume of inoculum is gently released onto the center of the dish and the lid is replaced.
    2. Discard the pipette and remove the bulb while the pipette is above the disinfectant container.

    Pour the plate

    1. One bottle of sterile molten agar is collected from the water bath.
    2. The bottle is held in the right hand and the cap is removed with the little finger of the left hand.
    3. The neck of the bottle is flamed and the lid of the Petri dish is lifted slightly with the left hand and the sterile molten agar is poured into the petri dish and replacing the lid.
    4. The neck of the bottle is flamed and the cap is replaced.
    5. The dish is gently rotated to mix the culture and the medium, to ensure that the medium covers the plate evenly.
    6. The plate allowed to solidify over a period of time.
    7. The plate is sealed and incubated in an inverted position.

    Using a spreader:

    Sterile microbiological spreaders are used to distribute inoculum above the surface of already prepared solid agar medium.

    Spread plate:

    A spread plate technique often gives confluent growth of culture spread evenly over the surface of the growth medium. The spread plate can be used for quantitative work. If the dilution and volume of the inoculum, usually 0.1 cm3, are known, the viable count of the sample. The dilutions chosen must be appropriate to produce about 100 countable colonies.

    1. The cap of the bottle or test tube containing the culture broth is loosened.
    2. A sterile Pasteur pipette is removed from it’s sterile pouch with the right hand and the bottle or test tube containing the broth culture is held in the left hand.
    3. The cap or cotton plug of the bottle or test tube is removed with the little finger of the right hand and the neck is flamed.
    4. A small amount of broth is aspirated with the pipette.
    5. The neck of the bottle or test tube is flamed and then the cap or plug is replaced.
    6. The lid of the Petri dish containing the solid nutrient medium is lifted with the left hand.
    7. A few drops of culture is placed on the surface about 0.1 cm3
    8. The lid of the Petri dish is then replaced.
    9. Discard the Pasteur pipette in a safe disinfection and disposal container.
    10. A glass spreader is dipped into alcohol, flamed and allowed to burn off.
    11. The lid of the Petri dish is lifted to allow entry of spreader.
    12. The spreader is placed on the surface of the inoculated agar and moved in a top-to-bottom or a side-to-side motion to spread the inoculum over the surface of the solid agar. Ensure that the entire agar surface is covered completely. Be quick to avoid contamination and the lid of the petri dish must be replaced immediately.
    13. The spreader is flamed using alcohol and the inoculum is allowed to dry.
    14. The plate is sealed and incubated upside-down (Ensuring that the media stays intact and does not fall on the lid).

    Moulds:

    Moulds are usually prepared as a spore suspension by ensuring that they are not escaping in to air. While handling moulds, ensure that the inoculum is taken as a small portion of the mycelium with a wire loop or straight wire with the end few millimeters bent at a right angle. When an agar plate with a mould is inoculated at the center, make sure not to accidentally touch the outer surface or allow the spores to fall from the loop or wire. We can achieve this by holding the plate upside down and smartly lifting the base of the dish and inoculating the center of the agar with the wire or loop.

Life Sciences
Mycoplasma Elimination in Cell Culture

Introduction Mycoplasma contamination in Cell Culture is a major concern and it can affect cell...

Continue Reading
November 12, 2021

Life Sciences
Techniques for maintaining, preparing, and using Pure Microbial cultures

Obtaining pure cultures Microbiology laboratory cultures must be obtained from a reputed and...

Continue Reading
November 11, 2021

123
Page 3 of 3


Aseptic handlingMicrobiologyMicrobiology LabsTechniques

Related Articles


Life Sciences
The Evolution of Biomedical Research: From Petri Dishes to Organ-on-a-Chip Technology
Life Sciences
Prolonging Pipette Performance : Essential Tips for Longevity and Accuracy

Leave A Reply Cancel reply

You must be logged in to post a comment.

Mycoplasma Elimination in Cell Culture
Previous Article
3<sup>rd</sup> Generation Centrifuge Tubes for Modern Research
Next Article

Linkedin Facebook Twitter
Copyright 2024 by ABDOS Life Sciences All Right Reserved.